While gardening activities may be limited this time of year in northeast Ohio, it’s the perfect season for starting native plants from seed. Following the recently concluded National Invasive Species Awareness Week, I want to share some reasons why you should include native plants in your garden and show how easy, affordable, and rewarding it is to grow them from seed yourself at home. Plus, it’s a great remedy for the late winter blues!
Why grow native?
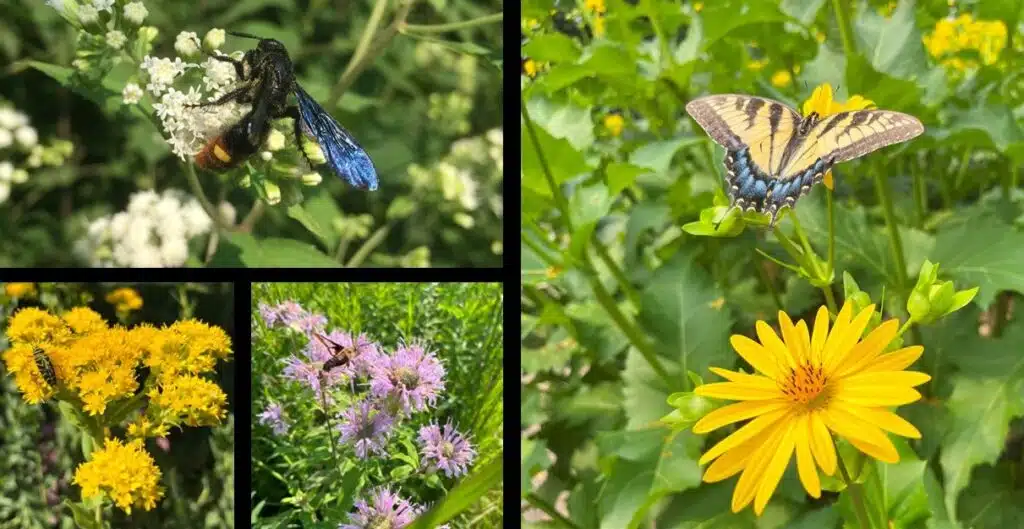
When it comes to supporting local biodiversity, native plants simply do it best. Our native plant species have evolved alongside the pollinators, birds and mammals of our region and thus are best adapted to support them throughout every stage of the life cycle. The vast majority of native insects are specialists, meaning that one or more stages of their life cycles are dependent on a limited suite of host plants. This specialization enables native plants to support insects, particularly during the larval stage, in ways that non-natives cannot.
A classic example of insect-host plant specialization is the relationship between monarch butterflies and milkweed: although monarch butterflies drink nectar from a variety of plants, they lay their eggs exclusively on milkweed (Asclepias species). Due to the ongoing decline of monarch populations, milkweeds have become the posterchild for native plants, but there are thousands more plant-insect relationships that get far less publicity. Part of the fun of native gardening is learning about all of the beautiful and diverse insect species you support when you introduce a new native plant to your garden!
Fostering local biodiversity is just one of the many benefits of planting natives at home. There are so many more—ease of maintenance, water capture and filtration, personal connection to the landscape—far more than can be covered in this blog alone. Luckily for us, there is a wealth of information online. For those new to the world of native plants, a list of resources is provided at the end of this article. For now, let’s talk about seeds.

The perks of seeds
The most obvious benefit to growing plants from seed is that it is extremely cost effective. Depending on the species and the nursery, a single perennial plant in a one-gallon container can run you anywhere between $7-$20. In comparison, the $3-$5 you spend on one packet of seeds can provide you with tens, hundreds, or even thousands of plants! You can even get seeds for free by visiting native plant sales (native plant nurseries and conservation groups often give them away) or attending local seed swaps. If you grow more than you need, share with friends and family. Who could turn down free plants? The cost-effectiveness of growing from seed also grants you the freedom to experiment with a wider variety of species. This is particularly beneficial for native gardening because greater plant diversity equals greater insect and wildlife diversity.
That being said, some species have low germination rates or are slow to grow from seed. For these species, buying plants from a nursery can be an easier and more reliable option. For example, many spring ephemerals like trillium and bloodroot are notoriously difficult to grow from seed and take many years to reach flowering maturity. Unless you’re extremely patient, enjoy experimentation, and thrive on delayed gratification, consider sourcing these types of plants from a nursery.
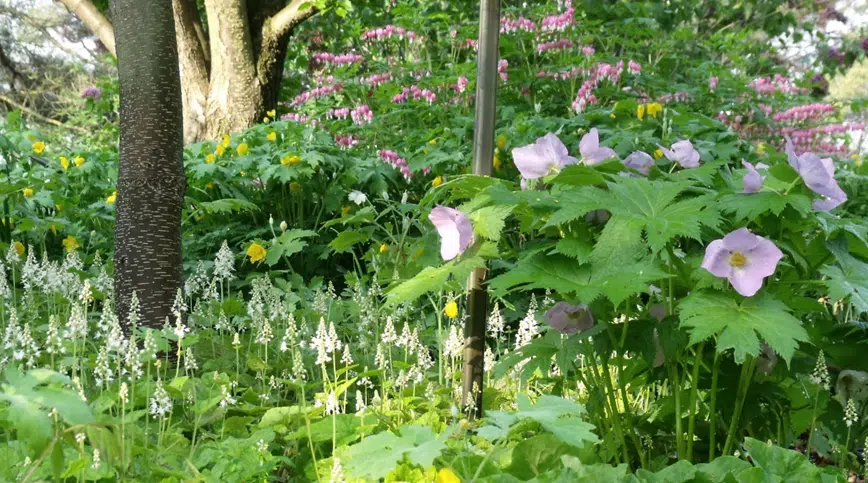
Finally, although it demands patience, growing your own plants from seed is very rewarding. It gives you the freedom to experiment, to fail, and to try new things. My first time growing native plants from seed was borne out of a desire to spruce up the area around my mailbox while spending as little money as possible. I chose two species: Monarda fistulosa (wild bergamot) and Monarda punctata (spotted bee balm). To my delight, the spotted bee balm bloomed in its first year, but the wild bergamot stayed relatively small and inconspicuous throughout the summer. The following year I was rewarded with a spectacular display of wild bergamot, but the spotted bee balm did not make an appearance. Regardless of which plants came and went, the new food source was much appreciated by the local bees, though probably less so by my mailman. I moved the following summer, so I never discovered whether my spotted bee balm returned. Nevertheless, my initial experiment with just these two species taught me that growing native plants from seed is a dynamic and rewarding journey.
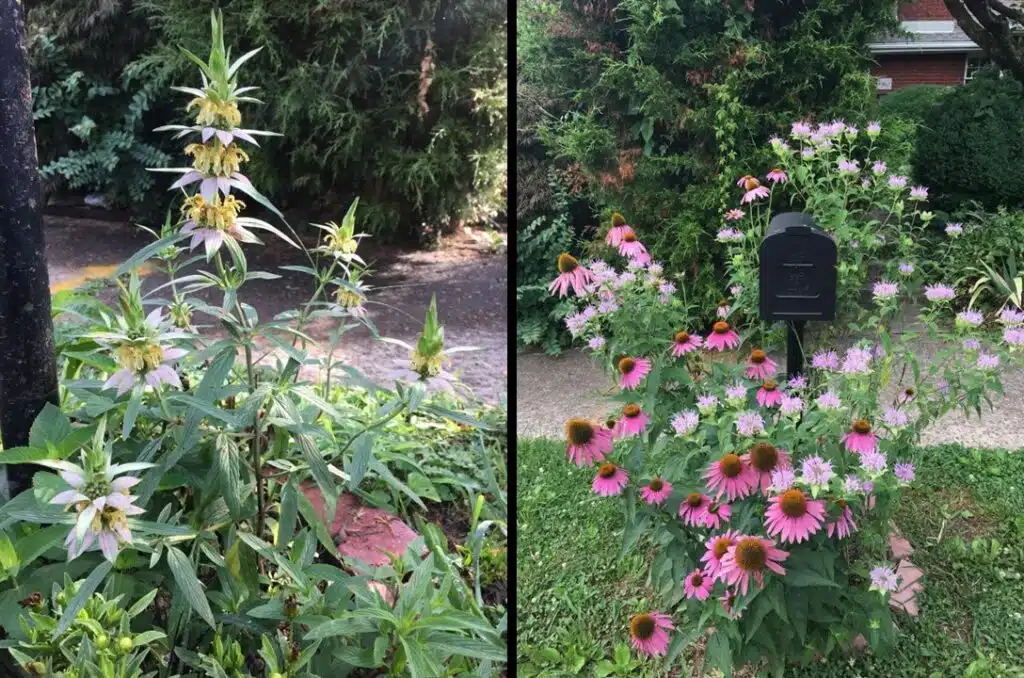
Two natives grown from seed. Left: spotted bee balm (Monarda punctata) flowering in year one. Right: wild bergamot (Monarda fistulosa) tasking off in year two. The purple coneflower (Echinacea purpurea) was not grown from seed.
Artificial stratification
The seeds of many native plants require a period of exposure to cold temperatures before they are able to germinate. This is because they have built-in dormancy mechanisms that prevent them from germinating before temperatures are consistently warm in the spring, preventing them from being killed by frost. To simulate the conditions that seeds experience while lying dormant in the soil over the winter, we can subject them to what is known as artificial stratification. By storing seeds in a cool, moist environment followed by warm temperatures and in many cases, light, we can induce germination. If you plan ahead and acquire your seeds by fall, you can let nature do the stratifying for you by simply sowing them on bare ground or in containers that you leave outside for the winter. But if you want to have a bit more control over where individual plants will go in your landscape, or like me, you did not plan that far ahead, artificial stratification is a quick and easy alternative. I am growing over 30 native species from seed this year, and I started the portion of them that need the longest period of cold stratification in back in February. The photos below help illustrate each step of the process I used to stratify my seeds.
1.Get organized
First, you need to figure out how long your seeds need to be stratified so that you can get them going at the right time of year. Regardless of where you acquire your seeds, an excellent resource for determining species-specific germination requirements is Prairie Moon Nursery’s website. Right now is a good time of year to start seeds that require two or three months’ worth of cold stratification.
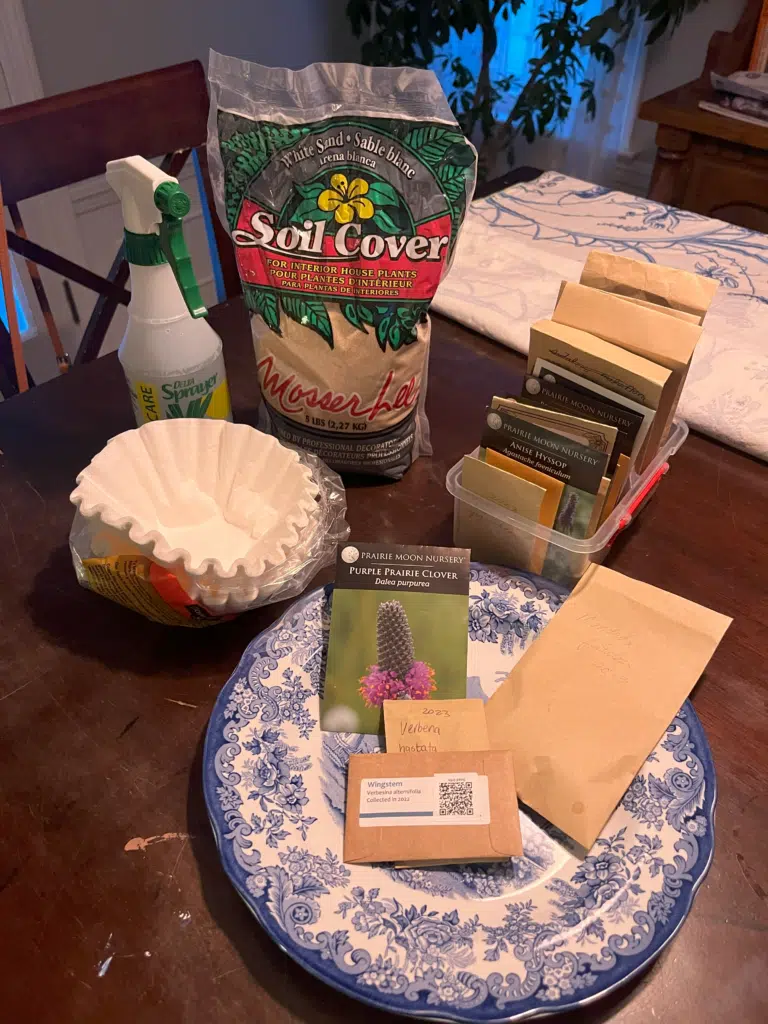
Once you have your seeds ready, gather your materials: coffee filters or paper towels, sand (optional), plastic bags, a spray bottle (or some other way to moisten your seeds), a pen or sharpie for labeling, and a clean surface to work on.
2. Wet your medium and sprinkle your seed
If you’re using paper towels or coffee filters, you want them to be moist but not sopping wet. Too much moisture can promote mold growth. Spread your seed in an even layer, then place another wet coffee filter or paper towel on top and fold to make a loose sandwich.
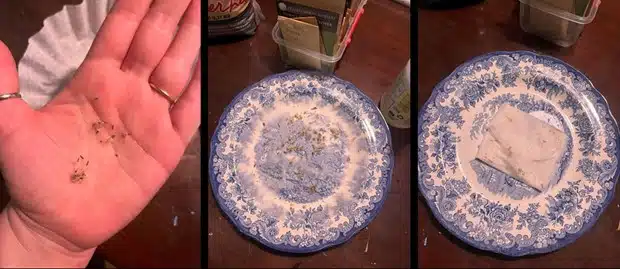
Sand can be useful for extremely small seeds that might be difficult to sow individually once they are done stratifying. For this method, mix a small amount of moistened sand with approximately equal parts seed. As with the paper method, you want the sand to be moist but not dripping wet. When the time comes to sow your seed in the spring, simply sprinkle the sand-seed mixture evenly onto the soil.
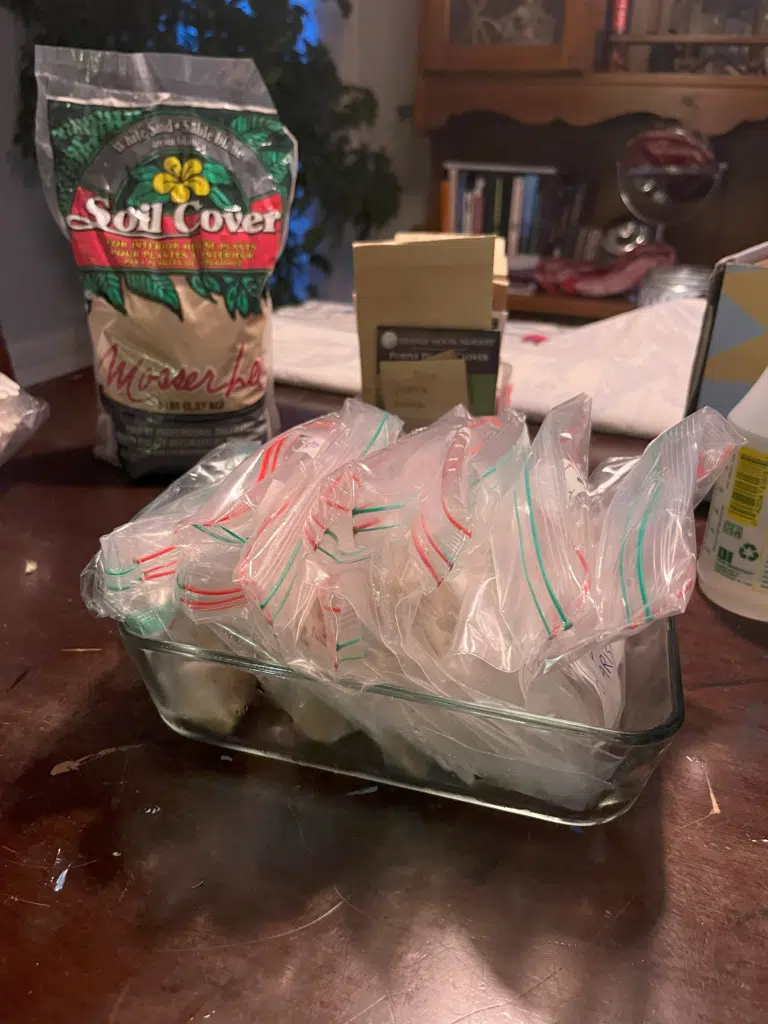
3. Bag and refrigerate
Place your seeds into a plastic bag and label them with the species and date. This year I experimented with leaving the tops of the bags unsealed to allow for air flow and occasional misting, but most guides recommend sealing to lock in moisture. Place your bags in the refrigerator and monitor weekly, misting if necessary to ensure that your seeds don’t dry out. If you have a lot of bags, propping them upright in a shallow dish works well to contain them.
4. Wait patiently
After your seeds have completed their recommended period of cold stratification, sow them in seed trays, containers, or directly in the ground. Keep in mind that some species take one or more seasons to reach flowering maturity.
Native plants are for everyone
You don’t have to replace your entire lawn this spring, or even an entire garden bed. If you’ve never started plants from seed before, experimenting with just one or two species is a great way to get started on your native plant journey. Every seed you sow is a step toward a more sustainable and biodiverse neighborhood, and even small steps can have significant impacts on our local ecosystems and communities.
Resources
Books about ecological gardening:
- Bringing Nature Home: How You Can Sustain Wildlife with Native Plants. Doug Tallamy, 2009.
- Prairie Up: An Introduction to Natural Garden Design. Benjamin Vogt, 2023.
Sources for native seed and plants:
- OPN Seed (Formerly Ohio Prairie Nursery)
- Prairie Moon Nursery
- Wild Seed Project
- List of Ohio nurseries that sell native plants
Information on individual species identification, natural history, and benefits to wildlife:
- Minnesota Wildflowers website – Detailed photos and descriptions of plants native to the Midwest.
- Illinois Wildflowers website – Not searchable by species, but if you google a native plant species, a page from this website usually comes up. Fantastic information on habitat preference, pollinator and wildlife use, and natural history.
- North Carolina Extension Gardener Plant Toolbox – More horticulture-focused, so not every native species is in the database.
Local conservation groups that provide educational resources, host webinars, and run plant sales and seed swaps:
Alexandra Faidiga
Assistant Curator
Alex collaborates with the Curator of Living Collections, Plant Records Curator, and horticulture staff to ensure the Living Collections are not only captivating but also meaningful for research, ecology and conservation. Alex also helps coordinate collecting trips to acquire new plants for the Living Collections and documents them using GIS and our plant records database. She is motivated by the role public gardens can play in preserving biodiversity and loves helping people discover their new favorite plant.
Here’s more to explore

May 28, 2024
A Guide to Pinching Seedlings
By Rob Dzurec, Horticulturist
As spring blooms with promises of new beginnings, gardening enthusiasts eagerly sow seeds, nurturing their dreams of lush greenery and vibrant blooms. Among the many techniques to ensure healthy growth,... more
February 7, 2024
Using Plant Protection to Push Ohio’s Plant Hardiness Zone
By Sandi Cesarov, Horticulturalist
Like any other plant collector/hoarder, I often covet the things that I cannot have. There are many plants that we cannot enjoy in Ohio because our winter temperatures are too... more

July 31, 2023
Late Summer Maintenance to Keep Your Garden Flourishing
By Rob Dzurec, Horticulturalist
As the scorching days of summer gradually give way to the cooler nights of late summer, gardeners find themselves amidst a pivotal period for garden maintenance. Late summer is a... more
February 15, 2023
Garden Inspiration
By Ann Rzepka Budziak, Director of Horticulture
Seed catalogs and availability lists begin trickling into mailboxes and inboxes in February at the same time the world outside looks grey and white, begging for a bit of color. ... more
January 18, 2023
Top Choice Tools of the Pros
By Mary Lineberger, Gardener
Installment II Disclaimer: Any brand names mentioned or pictured in this article are not an endorsement. They are the preferences of individual garden and tree care professionals. Welcome to the... more

November 9, 2022
10 Podcasts to Listen to While Gardening
By Hedy Wade, Gardener
Gardening can be so…boring. I don’t mean all the time, of course. I really love my job, but the pruning, leaf blowing, and weeding can be downright monotonous. And since... more
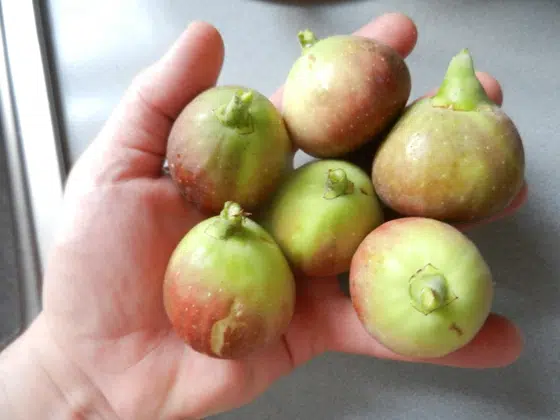
September 12, 2022
Growing Figs
By Matt Edwards, Animal Care Specialist
Figs have been cultivated for thousands of years and are one of the earliest plants to have been cultivated. They are originally from warm climates in western Asia and the... more

July 20, 2022
A New Way to Mulch: Wood Chips
By Rob Maganja, Horticulturist
Earlier this year, when still in the throes of winter, we found ourselves with many Lilac, Forsythia, and Viburnum branches lining the Display Gardens from recent prunings, and we wanted... more

June 22, 2022
The Rose Garden Challenge
By Stefanie Verish, Horticulturist
I knew what I was in for. It is no secret that roses maintain a reputation of fussiness and difficulty in maintenance. When I was given charge of the Svetland... more