
Indoor Seed Starting for Beginners
As I mentioned in a previous post for Holden Forests and Gardens, I spend my winter months planning out the upcoming garden season. I learned many things from books, magazines, my dad, and websites. I also discovered many things through trial and error that I will share with you.
Timing is everything, and I’ll break down the timing for you into easy to follow steps for the Cleveland area. Start small, just make sure you start. Start seeds with your child or a friend for increased enjoyment. Visit your garden daily to enjoy the earthly delights.
Why start seeds indoors?
My top three reasons to start your own plants from seeds are: it’s cheaper than buying green house grown plants, you can find a wider variety of seeds, and you can avoid potential pesticides.
Many crops can be sown directly outside- think leafy greens like lettuce, spinach, and arugula – they have a relatively short growing season. Carrots and radishes prefer direct sowing because they do not like to be transplanted.
Many fruits and vegetables have a longer growing season, – or time to maturity, and need a bit of a headstart in Cleveland and areas with similar climates. We are simply simulating ideal growing conditions to get our delicious harvest a little bit earlier.
Starting seeds indoors is a good idea for garden favorites like tomatoes, squash, broccoli, cucumbers, and peppers. Look at the back of the seed packets for this information. For example, most tomatoes produce fruit about 90 days from transplanting seedlings into the ground.
Where will you plant your garden?
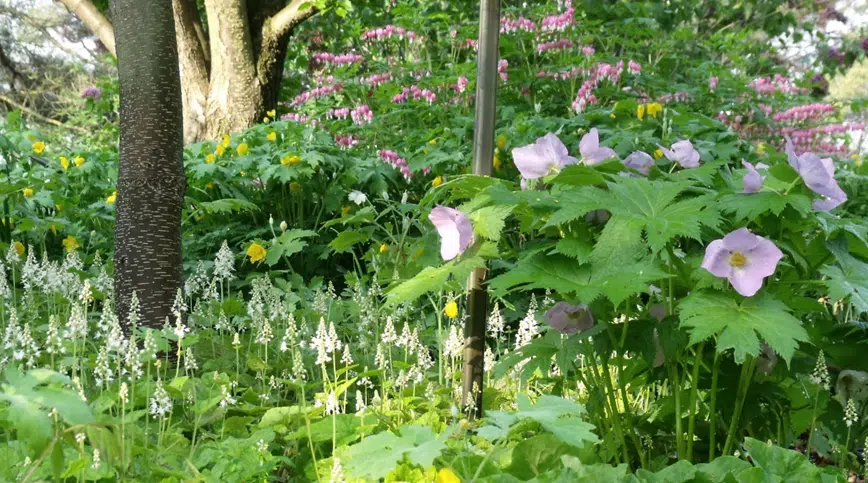
Plan where you will plant your seedlings in full sun. Full sun is 6 or more hours, especially between the hours of 10 am and 6 pm when the sun is most intense. If your yard isn’t obviously sunny, simply visit your preferred location every 1-2 hours on a sunny day during the growing season and record the times that have full sun.
Part sun of 4 – 6 hours will still yield you a crop, but it will be less. My dad plants his tomatoes against his house because the extra heat and light reflected off the house is like a heat island to promote growth. If you don’t have at least part sun of 4-6 hours, plant a woodland shade garden or find a community garden instead. You can also make a container garden and use this season to figure out your sunniest location.
Items you will need
A new hobby doesn’t have to be expensive. If you are just starting out, a few basic items can lead to success. Using materials you already have can also save money. Discount stores have many of these items available.
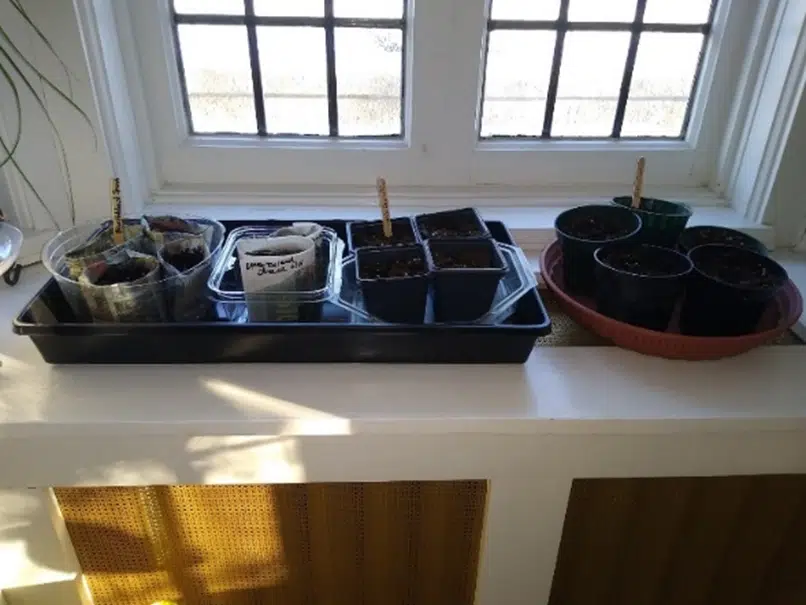
- Pots
- Seed Starting Mix
- Trays – black propogation trays or any other recycled tray
- Watering can
- Seed mat (Alternative: radiator)
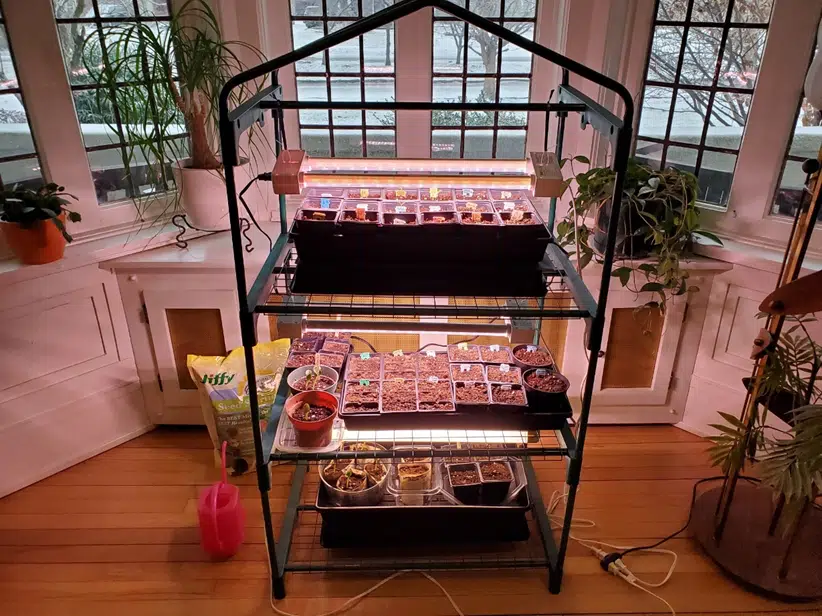
- Grow light – LED or flourescent
- Optional: Timer set to 16 hours per day
- Optional: Wire shelving/small wire greenhouse
February
- Make a plan. Choose a favorite food or something you are interested in trying.
- Buy or share seeds with friends. TIP – Cleveland Seed Bank partners with many local libraries to provide seeds to patrons. They also have an upcoming seed swap.
- Buy a bag of seed starting mix.
- Buy or gather small nursery pots and trays for holding pots. DIY Tip – Alternatively, make your own using newspaper strips that you roll around a can. I think that the 10 oz Campbell soup can size makes the best pots – just roll and tuck the bottom. You can tuck a little bit at the top for extra support. BONUS: the newspaper pots will biodegrade. Just make sure that the paper isn’t sticking up out of the ground – it will wick water from the tender roots and evaporate faster in the hot sun.
March
- Setup seed starting area. If you are still hibernating or a procrastinator like me, try not to delay. Aim for preparing your seed starting area by March 1, no later than March 15.
- Fill each pot to top with seed starting mix. TIP – It can be a bit messy, I like to put it in a bucket and use a long handled serving spoon or trowel to fill. Be prepared to vaccuum.
- Put pots in a tray for ease of watering. Warning – I prefer to use wire racks because condensation can cause water marks on wood surfaces. Use trivets or a liner on furniture to prevent leaving marks.
- Put 1 seed per container and push the seed down the size of seed (smaller seeds will be close to surface). TIP – I prefer to put only 1 seed in pot. I used to plant multiple tomato seeds in a pot, but then would have to thin them to one seed per pot. I always felt compelled to repot the seedling I pulled out.
- Water immediately with a small spout indoor watering can. Be gentle so you do not wash seed out of the pot.
- Label your plant immediately, it is easy to forget or confuse what you have started. White plastic nursery tags are easiest. DIY TIP – I like to reuse and recycle items I already have like popsicle sticks, sharpie on newspaper pots, bread bag tags,or even pieces of an old blind cut to size. The tags will go into the garden with the seedlings.
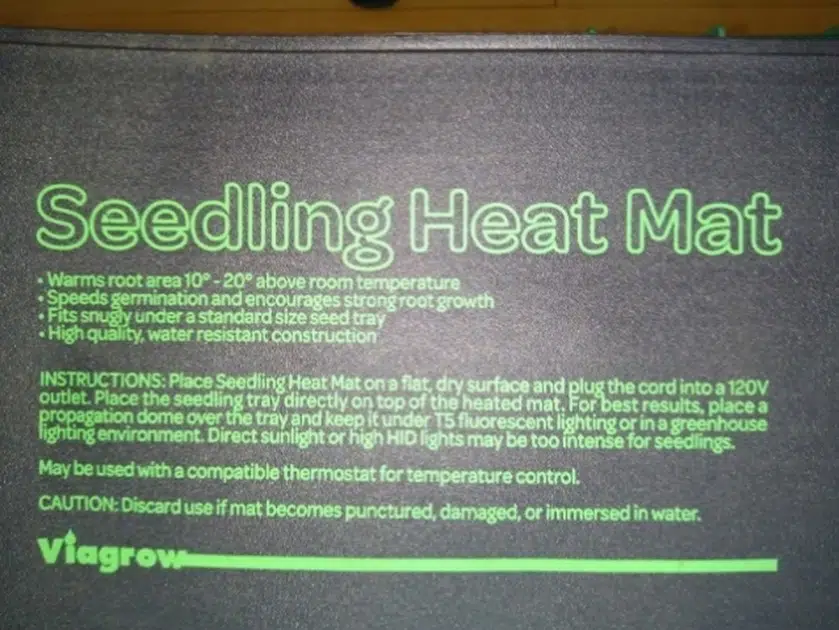
- Seeds need heat and water to germinate. Use a radiator or a seed heat mat. Seed mats are available at garden centers and big box stores and cost around $25.
- Keep seed starting mix evenly moist – not soaked and sitting in water. TIP – I like to water a little bit every day. The colder it is, the more our heating systems run, reducing the humidity in indoor air. The soil in your houseplants and seedlings is drying out just like your skin dries out.
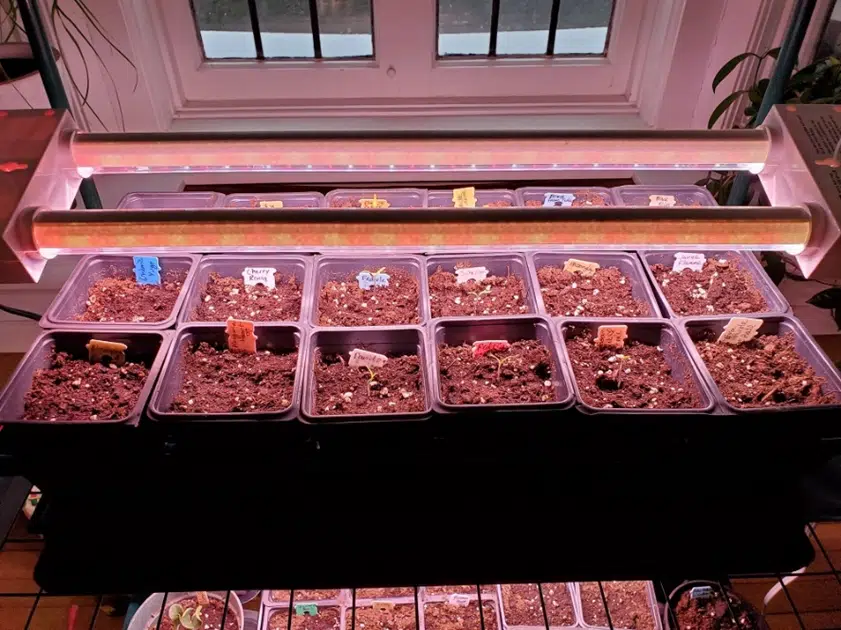
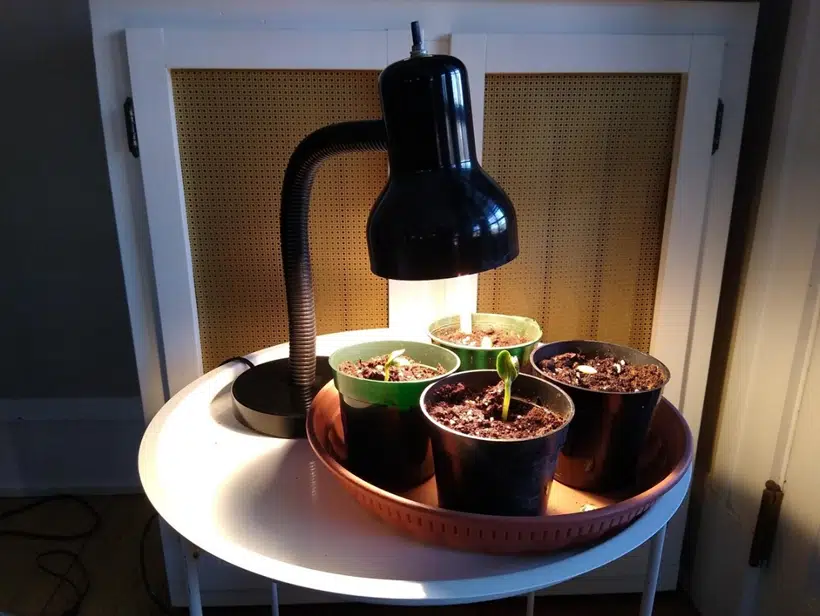
- When seeds start to grow, add light as close to the seedlings as possible to prevent spindly growth. TIP – I do advise that you purchase a grow light, so that your seedlings are receiving the needed red and blue wavelengths. I like the LED light tubes because they are energy efficient, but they are a bit pricey, I see many in the $30-$60 range. You can also buy flourescent grow light tubes, prices start around $10. TIP – Easily change the height of your light tubes by putting them on a chain or using zip ties or S hooks, or use a box or books to change height of the seedling trays.
- It is good practice to write down start dates and days to germination. This can help you improve seed starting practices and learn from your mistakes.
- I’ve read and heard that bright windows can work for seed starting – but Cleveland isn’t know for it’s sunny days in March. I think this popular tip may be better for sunnier locales.
April
- Water and rotate pots ¼ turn every 1-2 days.
- Adjust grow light as plants grow.
- If growing well, you could pot up to a bigger pot size to maximize growth.
- If it is 65F outside, take your seedlings outside to acclimate for a few hours at a time, increasing the length of time gradually. Seedlings are not ready for full sun yet so place in a shady spot. Nights are still too cold to leave your seedlings out.
May and Beyond
- May 15 is the average last frost date in Cleveland and your seedlings are ready to be planted. You can plant earlier, but be prepared to protect your seedlings from frost and temperatures below 32F by covering with plastic or fabric with support, or plastic or glass bottles. I prefer to keep my seedlings safe inside, because this is too much of a scramble for me. Just 2 years ago, we had a pretty substantial snowfall on May 10th! If you plant on May 15 and do the math for tomatoes, you should have some tomatoes by mid-August.
- Plant seedlings by digging a hole same depth as the plant and 2-3 times wider than the plant. Place plant in hole and gently refill soil around plant roots. TIP – Add a little bit of compost or leaf humus in the hole and around base of plant for extra nutrients, improved water retention, and some weed suppression.
- Water soil around seedlings gently and thoroughly. I like to use a small indoor watering can when newly planted so I don’t damage tender stems.
- Water every 1-2 days if no rain. If your seedling is wilting, water immediately.
- TIP– If using containers, you will need one with at least a 12” diameter to accommodate plant growth. Plants can dry out quickly in containers, so water daily if no rain. Containers must have drainage holes to prevent rotting roots.
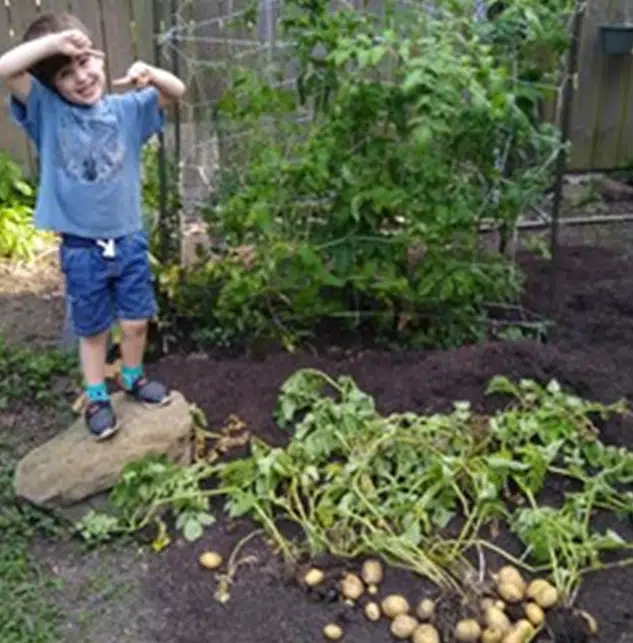
Hopefully you are successful and can enjoy the fruits of your labor. If not, don’t give up. Try again next year, I am sure you learned something about the process and you can learn from your mistakes. And if you are like me, you will end up with a little more garden gear and several more seed packets each year.
Sandi Cesarov
Horticulturist
Sandi Cesarov is a horticulturist at the Holden Arboretum campus. She earned a degree in Botany from Miami University. She is excited to get her fruits and vegetables growing with the help of her gardening assistant.
Here’s more to explore

May 28, 2024
A Guide to Pinching Seedlings
By Rob Dzurec, Horticulturist
As spring blooms with promises of new beginnings, gardening enthusiasts eagerly sow seeds, nurturing their dreams of lush greenery and vibrant blooms. Among the many techniques to ensure healthy growth,... more
March 26, 2024
Planting Natives: How to do it and why it’s important
By Alexandra Faidiga, Assistant Curator
While gardening activities may be limited this time of year in northeast Ohio, it’s the perfect season for starting native plants from seed. Following the recently concluded National Invasive Species... more
February 7, 2024
Using Plant Protection to Push Ohio’s Plant Hardiness Zone
By Sandi Cesarov, Horticulturalist
Like any other plant collector/hoarder, I often covet the things that I cannot have. There are many plants that we cannot enjoy in Ohio because our winter temperatures are too... more

July 31, 2023
Late Summer Maintenance to Keep Your Garden Flourishing
By Rob Dzurec, Horticulturalist
As the scorching days of summer gradually give way to the cooler nights of late summer, gardeners find themselves amidst a pivotal period for garden maintenance. Late summer is a... more
February 15, 2023
Garden Inspiration
By Ann Rzepka Budziak, Director of Horticulture
Seed catalogs and availability lists begin trickling into mailboxes and inboxes in February at the same time the world outside looks grey and white, begging for a bit of color. ... more
January 18, 2023
Top Choice Tools of the Pros
By Mary Lineberger, Gardener
Installment II Disclaimer: Any brand names mentioned or pictured in this article are not an endorsement. They are the preferences of individual garden and tree care professionals. Welcome to the... more

November 9, 2022
10 Podcasts to Listen to While Gardening
By Hedy Wade, Gardener
Gardening can be so…boring. I don’t mean all the time, of course. I really love my job, but the pruning, leaf blowing, and weeding can be downright monotonous. And since... more
September 12, 2022
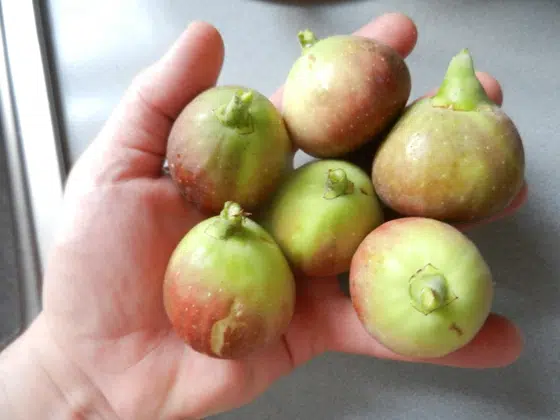
Growing Figs
By Matt Edwards, Animal Care Specialist
Figs have been cultivated for thousands of years and are one of the earliest plants to have been cultivated. They are originally from warm climates in western Asia and the... more

July 20, 2022
A New Way to Mulch: Wood Chips
By Rob Maganja, Horticulturist
Earlier this year, when still in the throes of winter, we found ourselves with many Lilac, Forsythia, and Viburnum branches lining the Display Gardens from recent prunings, and we wanted... more